

There will always be one or two household cleaners that you will struggle to create for yourself – why- because there are lots of recipes out there and we all have different expectations from the things that we make. My biggest problem was the dishwashing liquid and in fact I have written about that at length! But for some people it is products such as stain removers for clothes washing that cause them a few issues. After all, you really want the stain remover to be effective so it might be tempting to keep using the commercial one just in case. But I encourage you to stick to your resolve to reduce nasty chemicals in your home and try the simpler ways to clean.
I personally don’t use stain remover much as my children have all grown up and we just don’t seem to get all that dirty now! But I have at times thought that I would like to try to make a product – just in case!! In fact, someone asked me a few months ago about a stain remover recipe that used hydrogen peroxide as a key ingredient. At the time I thought that sounded a bit dangerous as hydrogen peroxide can bleach fabric very easily if applied too heavily.
So I thought I would experiment with a few recipes and give you my thoughts on what works and doesn’t work.
3 x DIY Stain Remover Recipes to be Tested
I tried three recipes that I will outline below . Click on the recipes to access the ingredients and instructions. Recipes 1 and 2 are for pre-wash sprays.
This recipe uses water, vegetable glycerin and Castile soap but also includes hydrogen peroxide 3% strength and lemon essential oils as the stain removing agents.
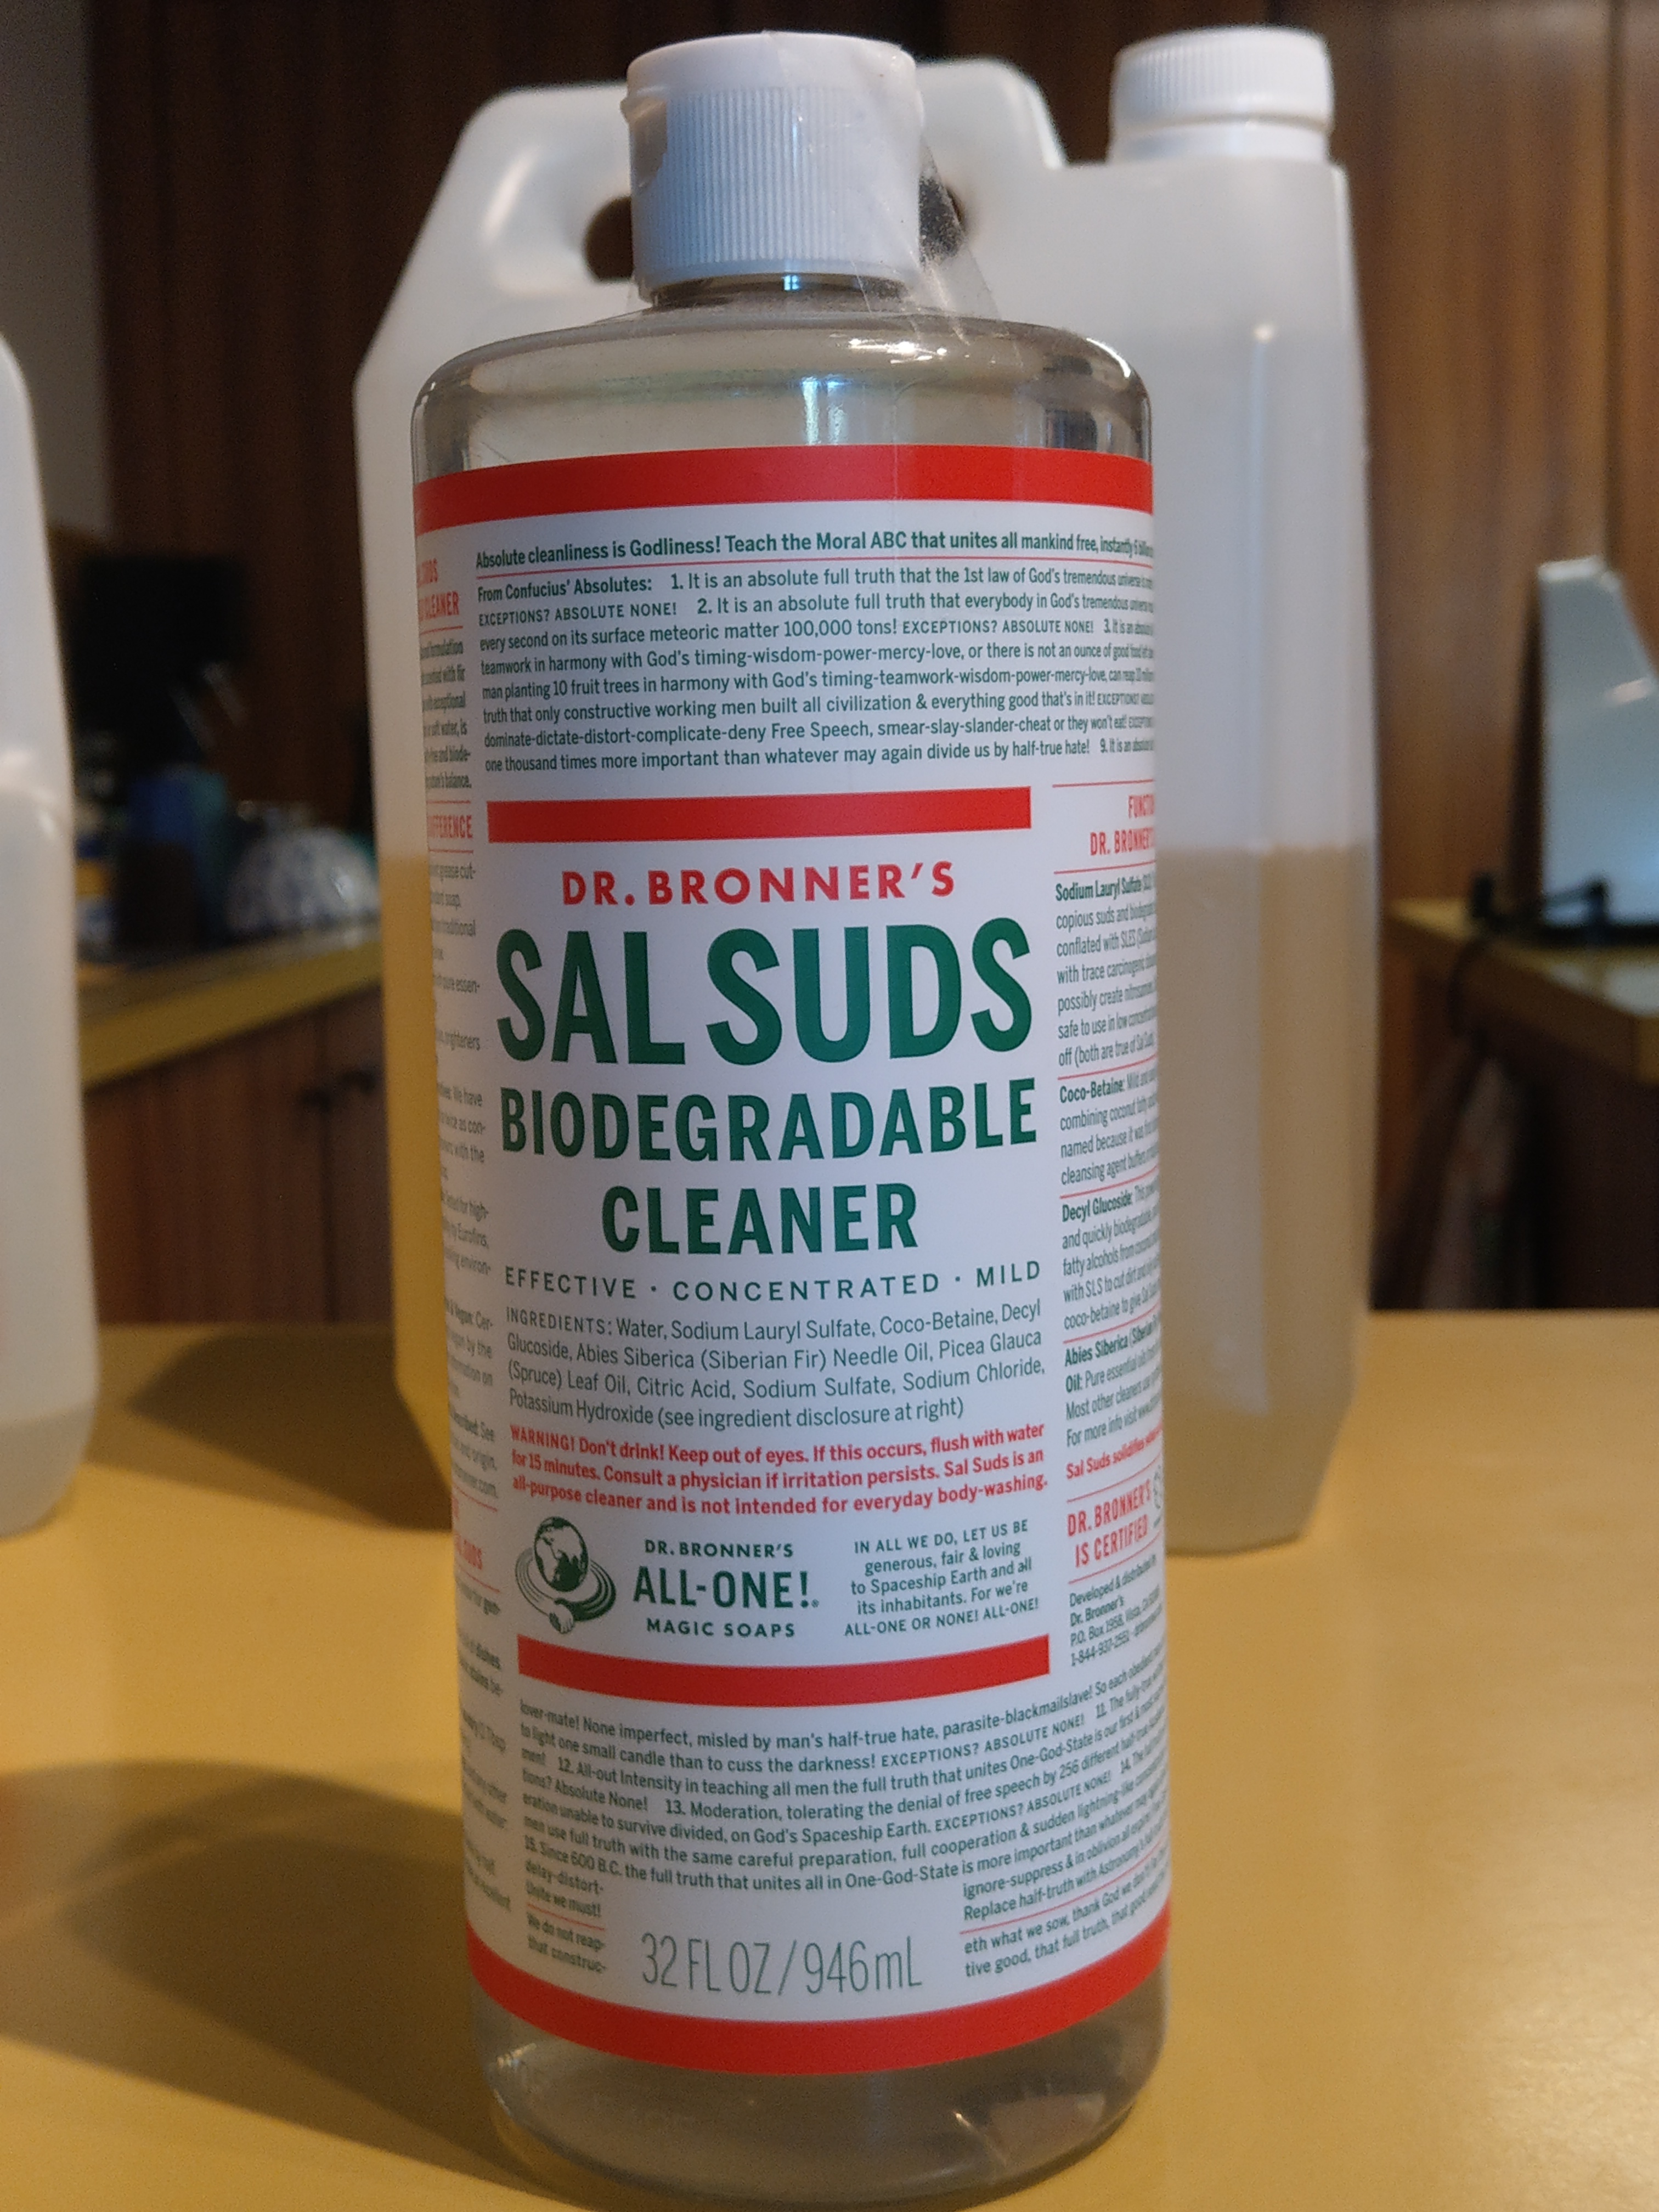
This recipe is the simplest of the three I used and is made by diluting Dr Bronner’s SalSuds with water.
This recipe is called a stain solution and requires at least 4 hours soaking prior to washing. It contains hydrogen peroxide 3% strength, washing soda and warm water.
Washing
After stain treatment I washed the fabric with my DIY Clothes Washing Powder (2 tablespoons of powder in 9 L warm water). My washing method consisted of agitation by hand for 2 minutes and then a 30 second rinse with clean water.
My Stain Remover Recipe Testing Method
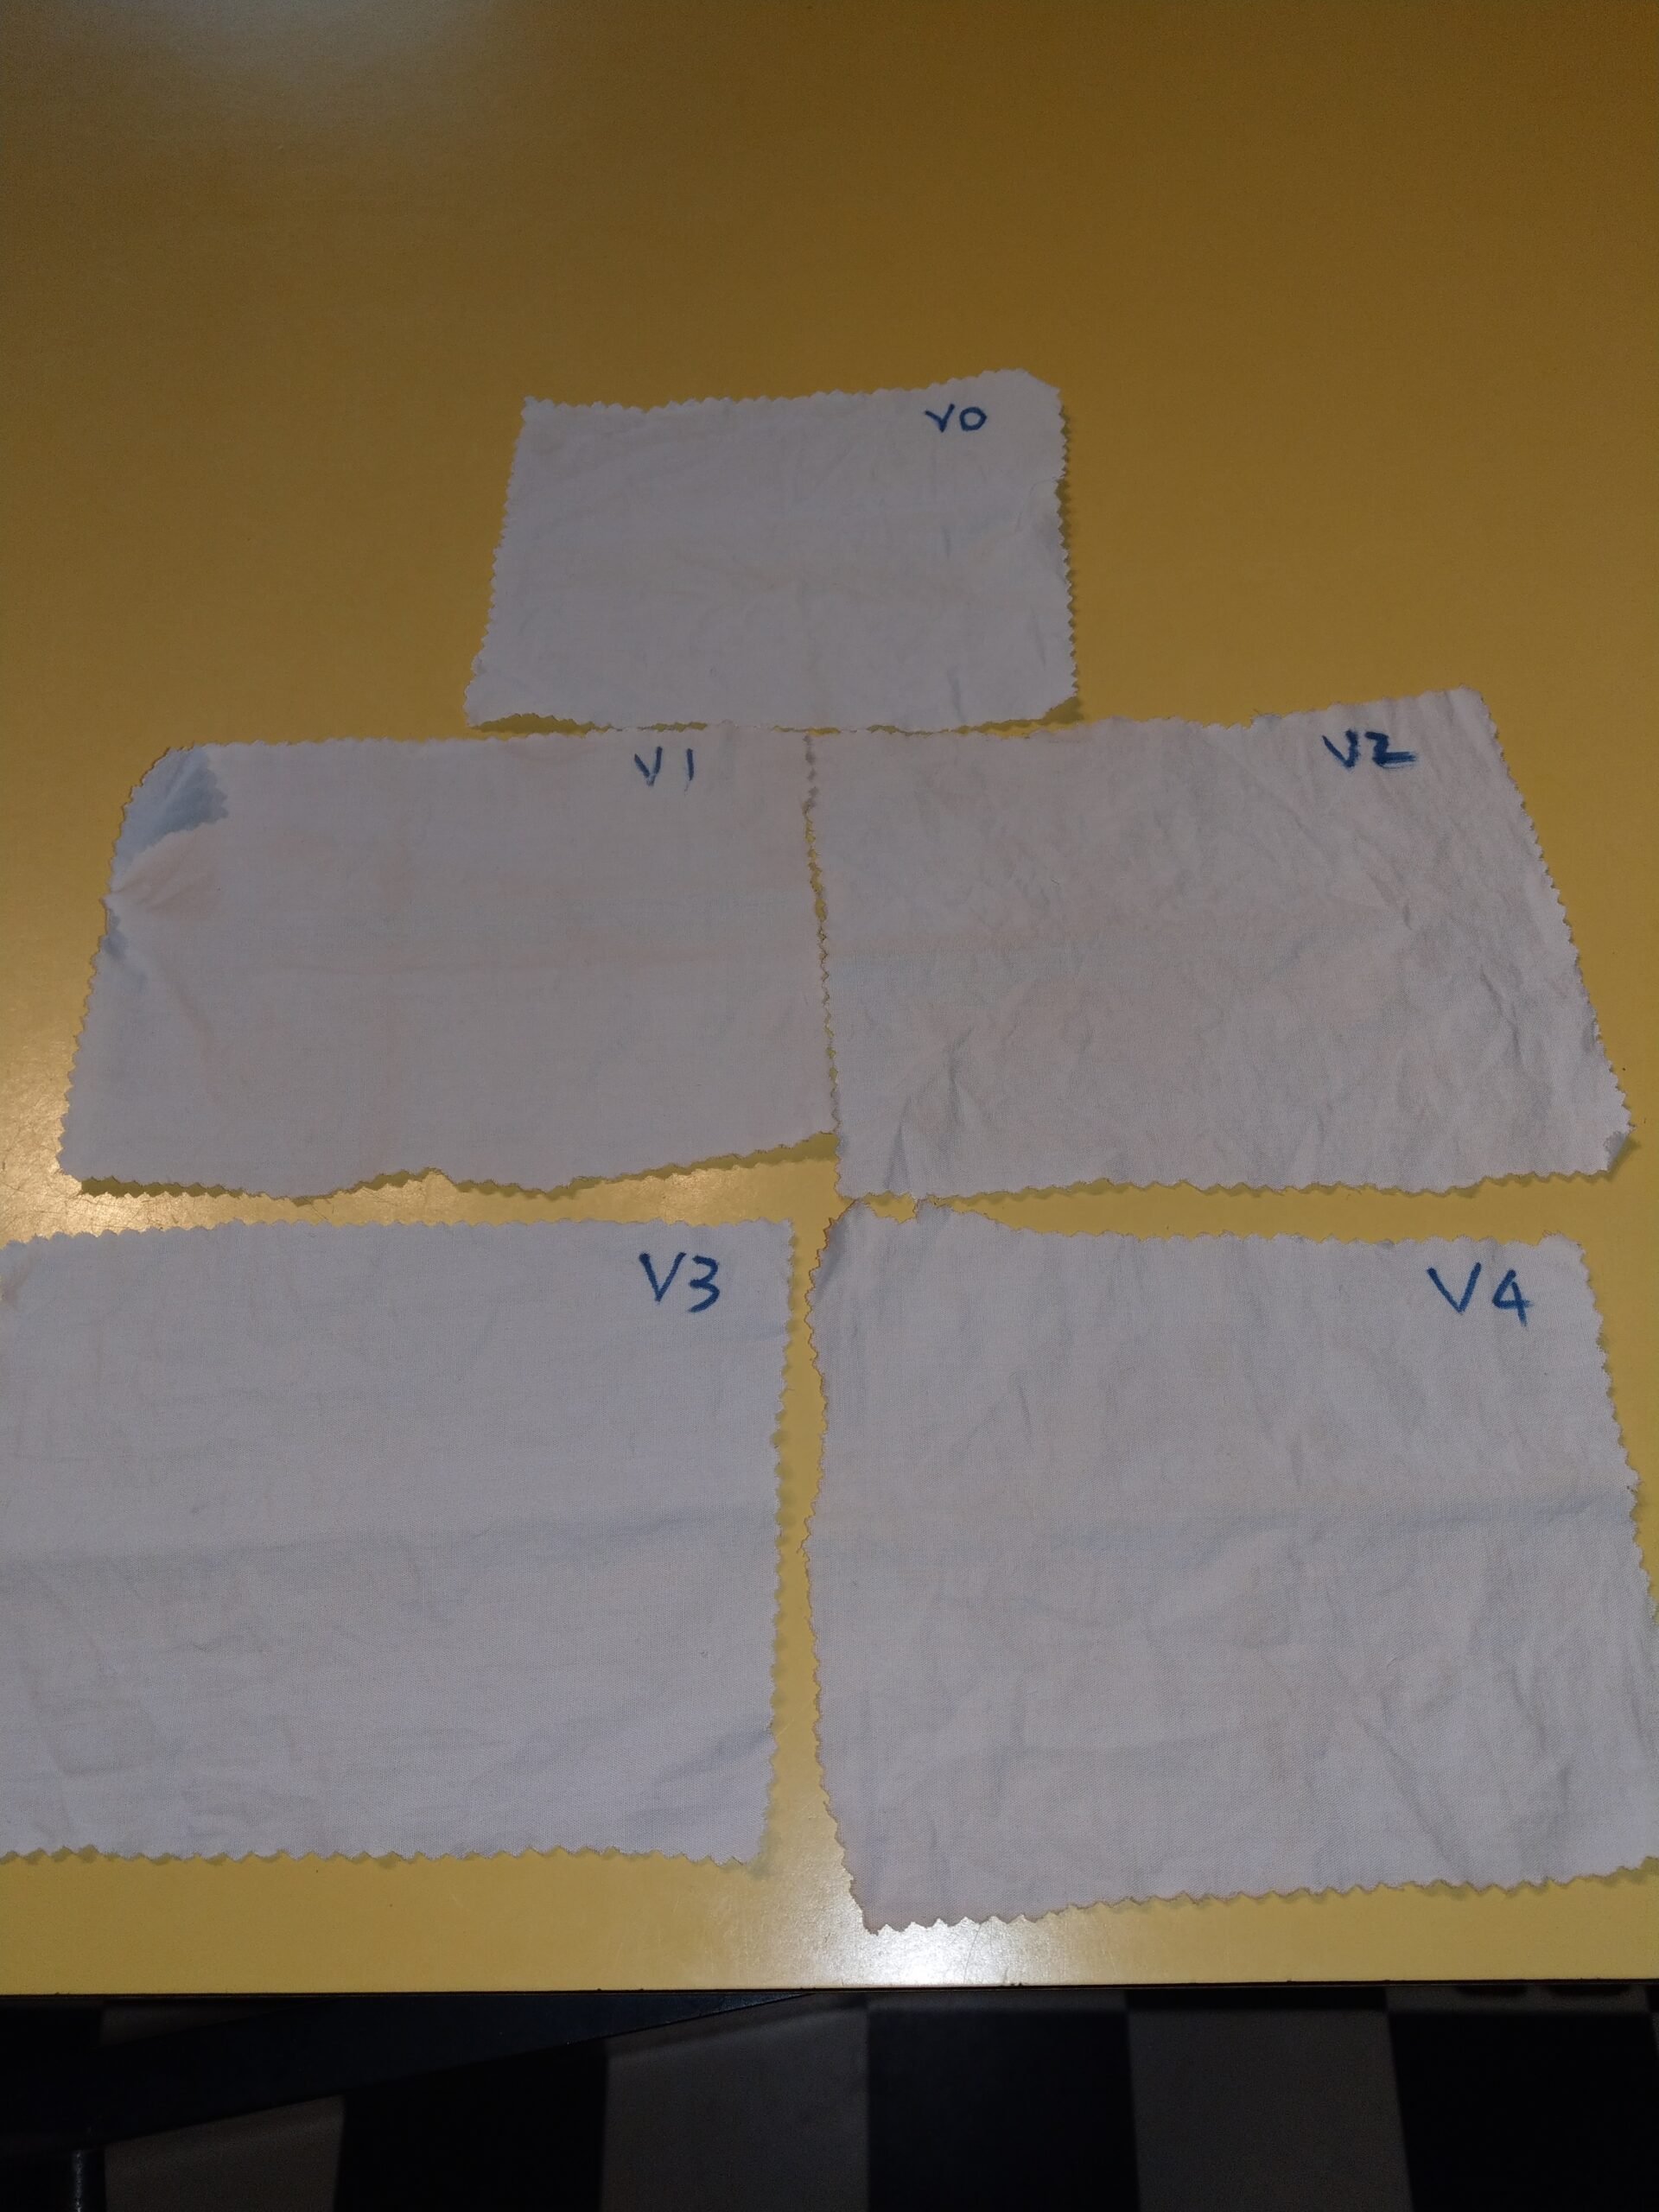
I used samples of a new bed sheet to test the DIY Stain Remover recipes. I cut the sheet into small rectangles and numbered them from 0-4. I actually cut two sets so that I could use two different food stuffs to make the strains. I used Red Wine as my first stain agent and Vegemite as my second stain agent. The Vegemite was added to water and mixed into a slurry.
This is my numbering system for both sets of stains:
Rectangle 0: No stain, no stain treatment, washed with DIY Clothes Washing Powder
Rectangle 1: Stained, treated with Recipe 1 Stain Remover, washed with DIY Clothes Washing Powder
Rectangle 2: Stained, treated with Recipe 2 Stain Remover, washed with DIY Clothes Washing Powder
Rectangle 3:Stained, treated with Recipe 3 Stain Remover, washed with DIY Clothes Washing Powder
Rectangle 4:Stained, no stain treatment,washed with DIY Clothes Washing Powder
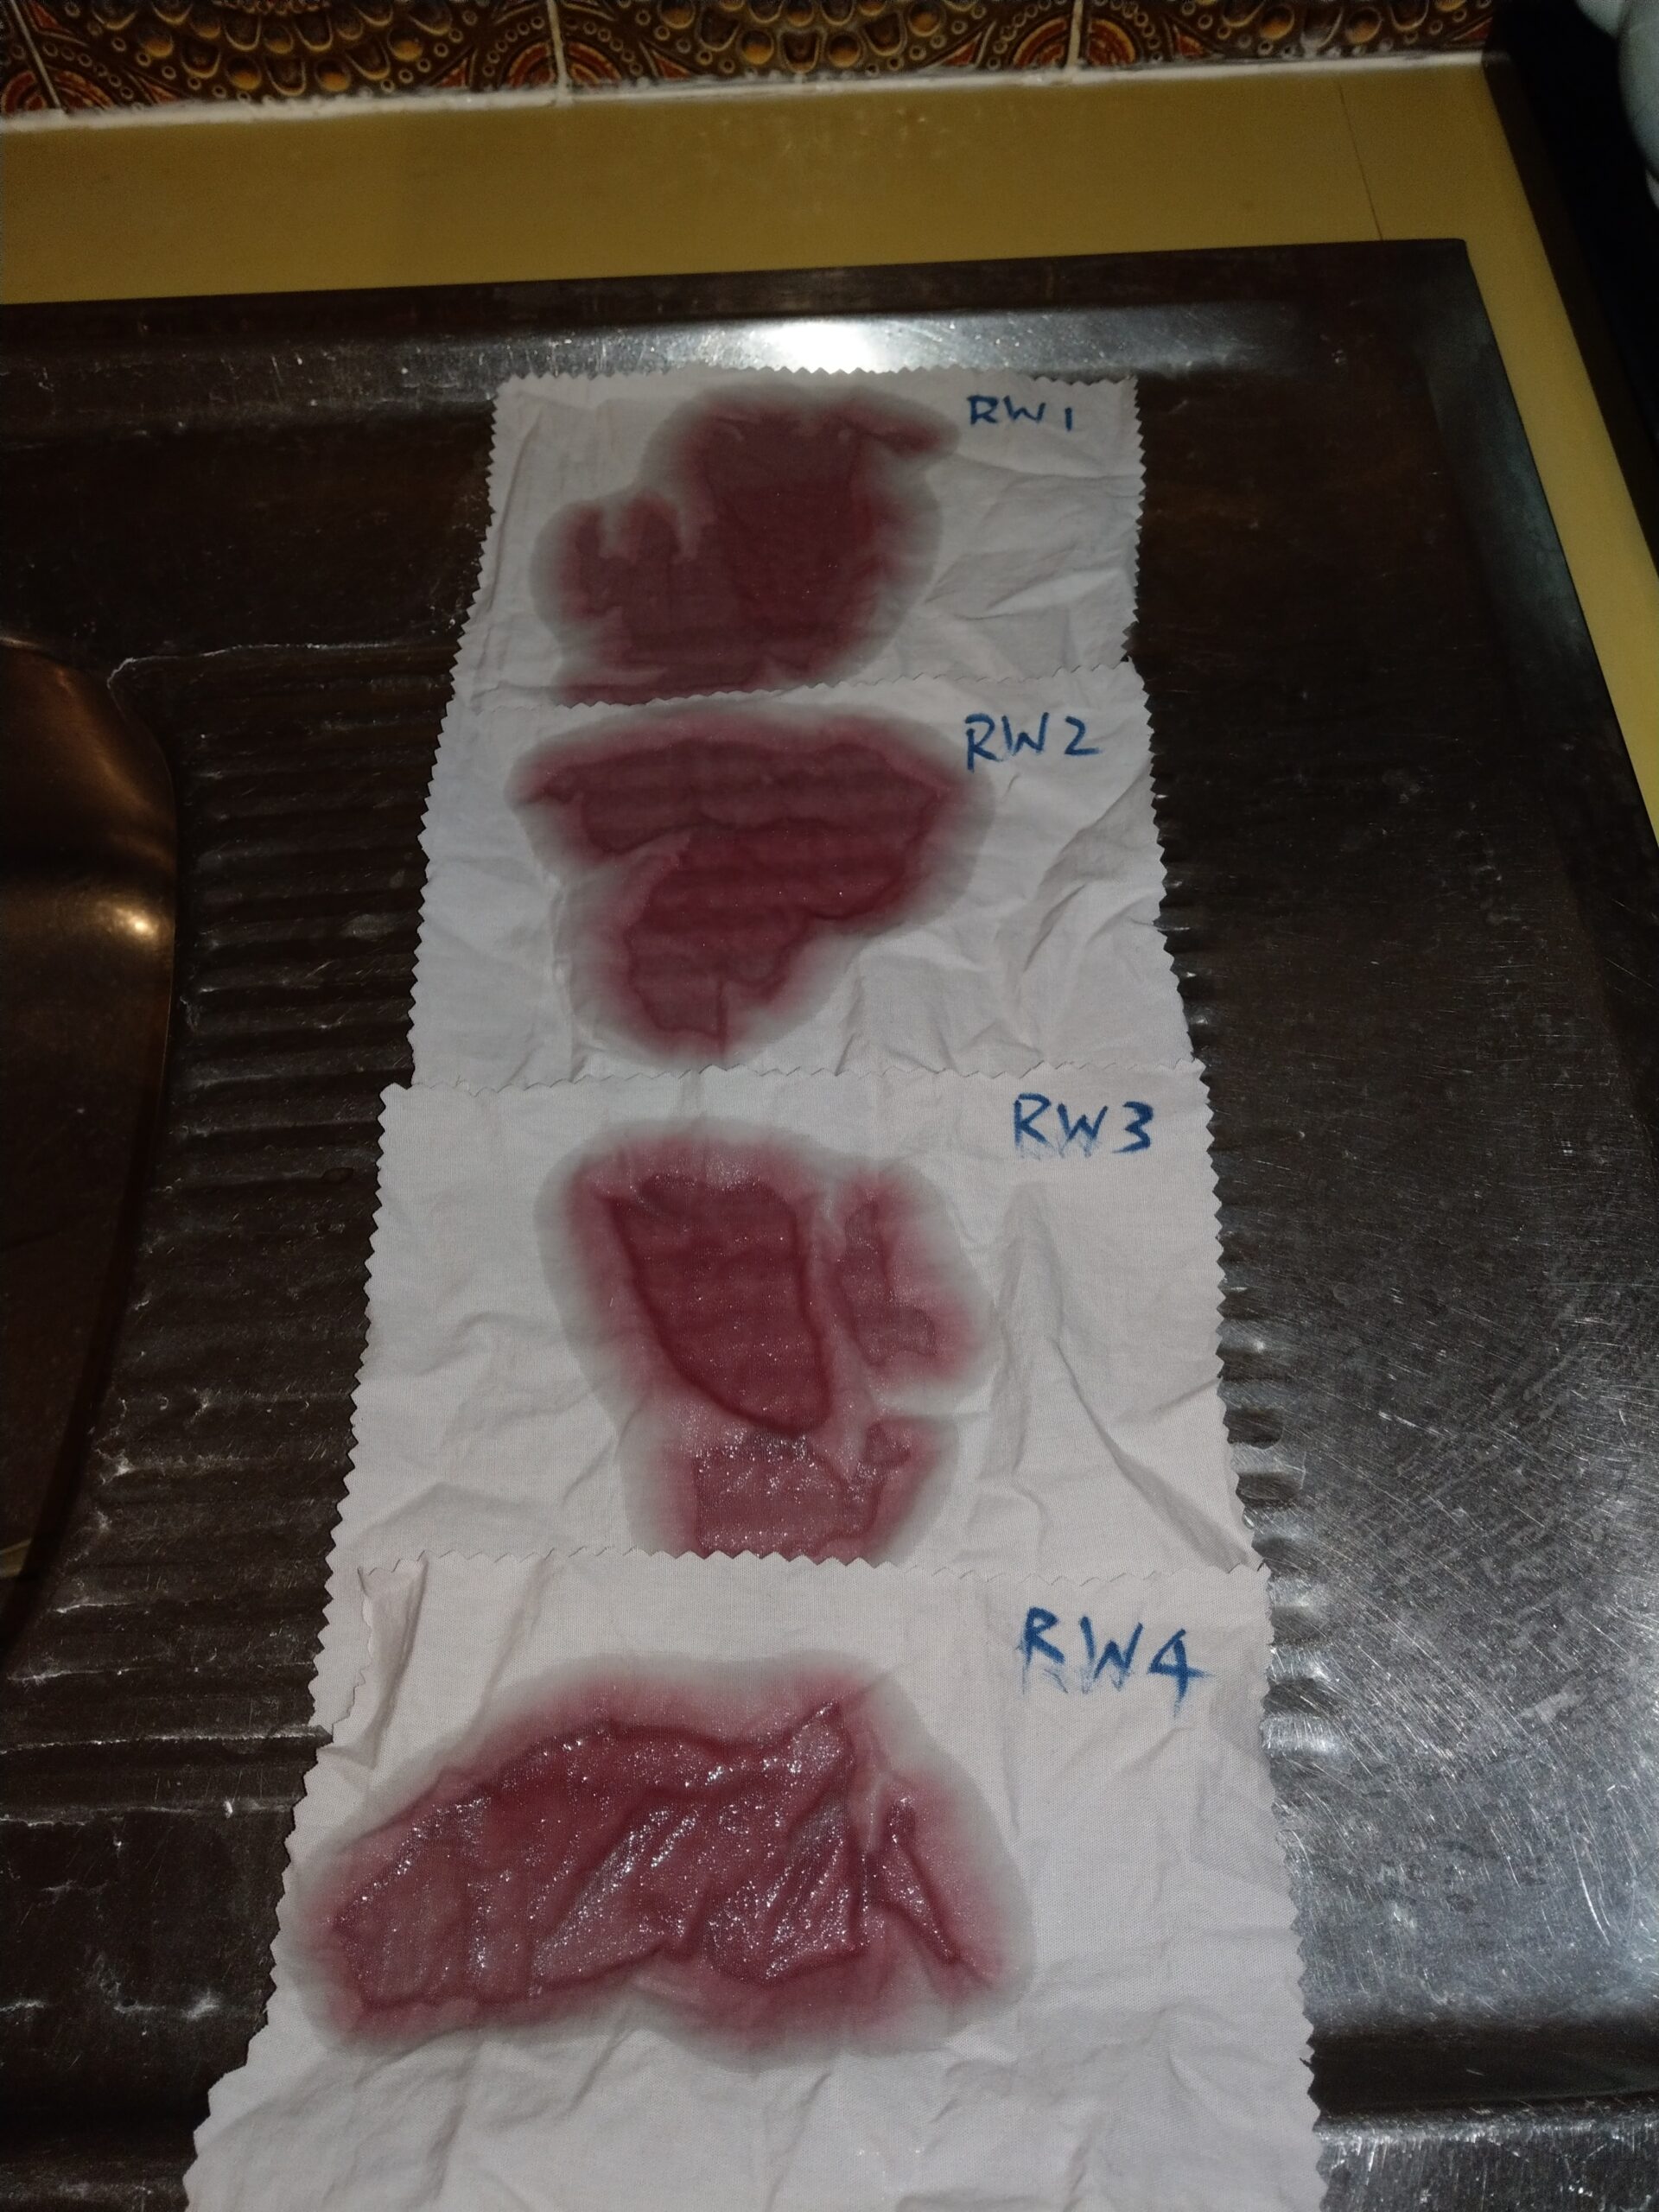
Here some pictures of the Red Wine Experiment
Here are the pieces of fabric just after the red wine was applied.
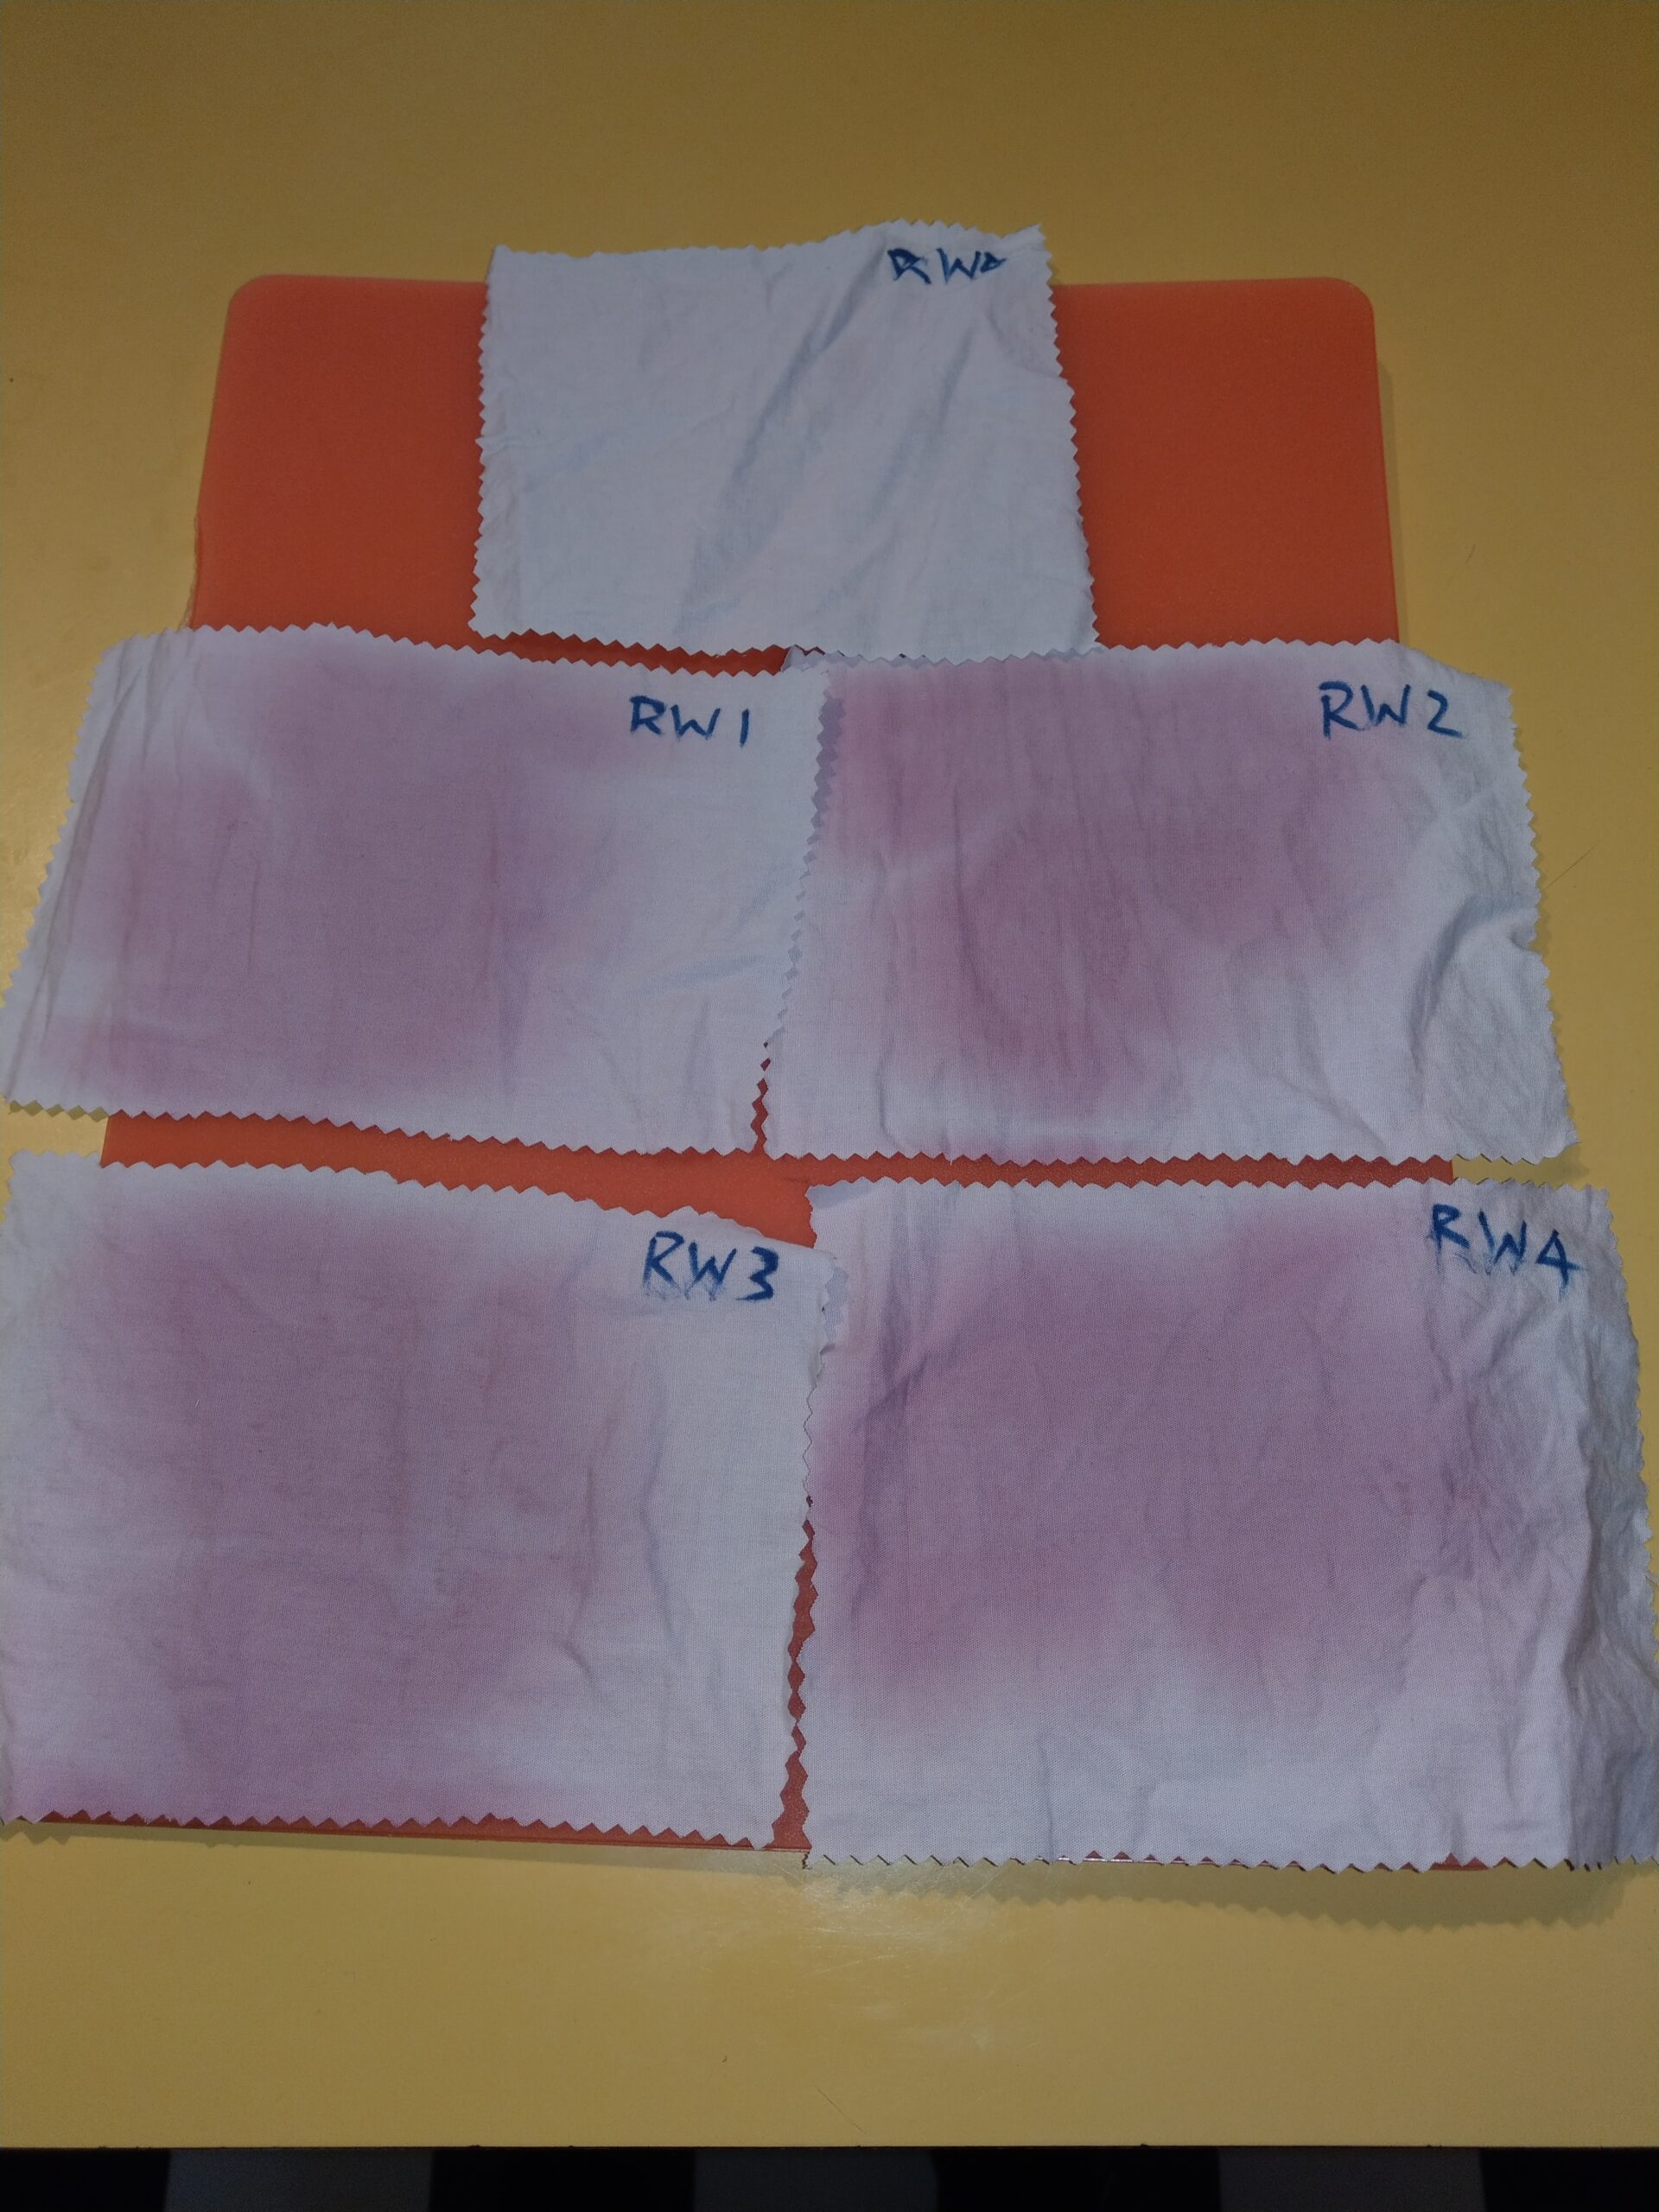
This is the fabric after 24 hours of drying. RW0 is the piece of fabric that was not stained.
This picture was taken immediately after washing the fabric i.e. post treatment with stain removers.
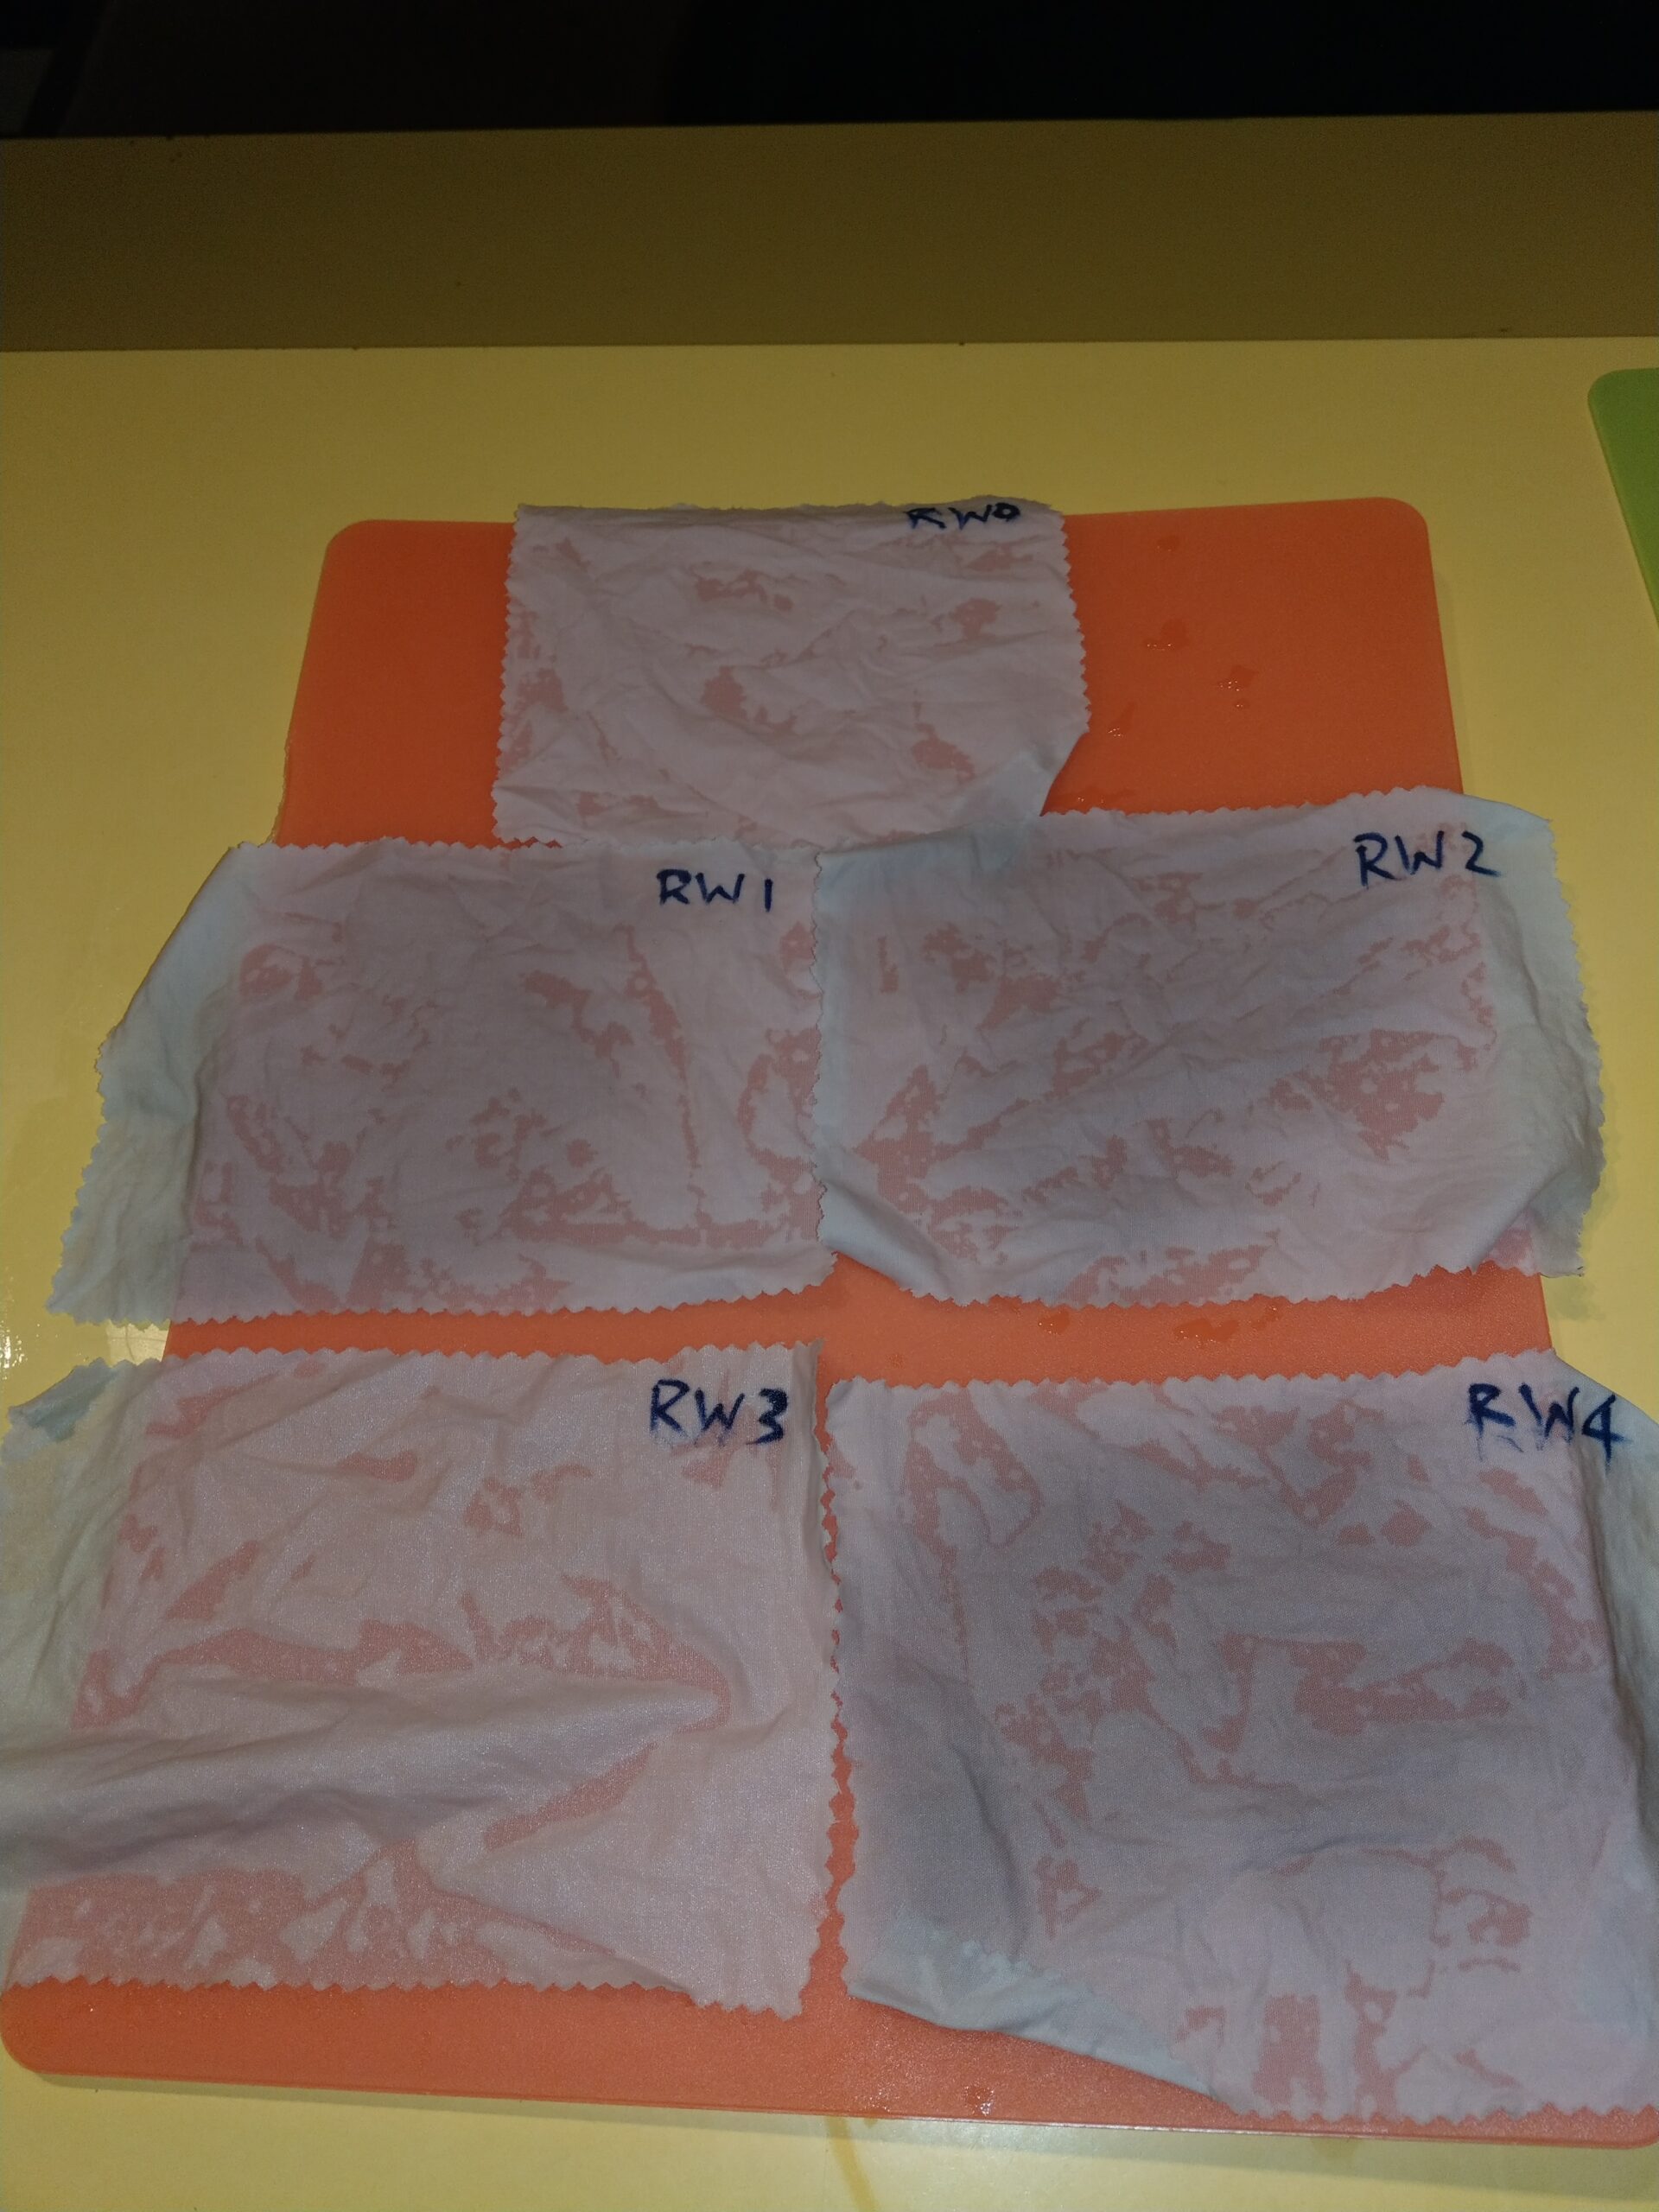
This is the final photo of the fabric once it has been dried. I know it is difficult to see but Stain Remover – Recipe 3 was the most effective. You can definitely see below that the fabric sample that was stained and not treated ( RW4) was still dark in colour. What is less obvious from the photo is that RW1 and RW 2 were also slightly dark.

Here are some pictures of the Vegemite Stain Experiment
Here is the fabric stained with Vegemite – the stain was dried on for 24 hours prior to treatment and washing.
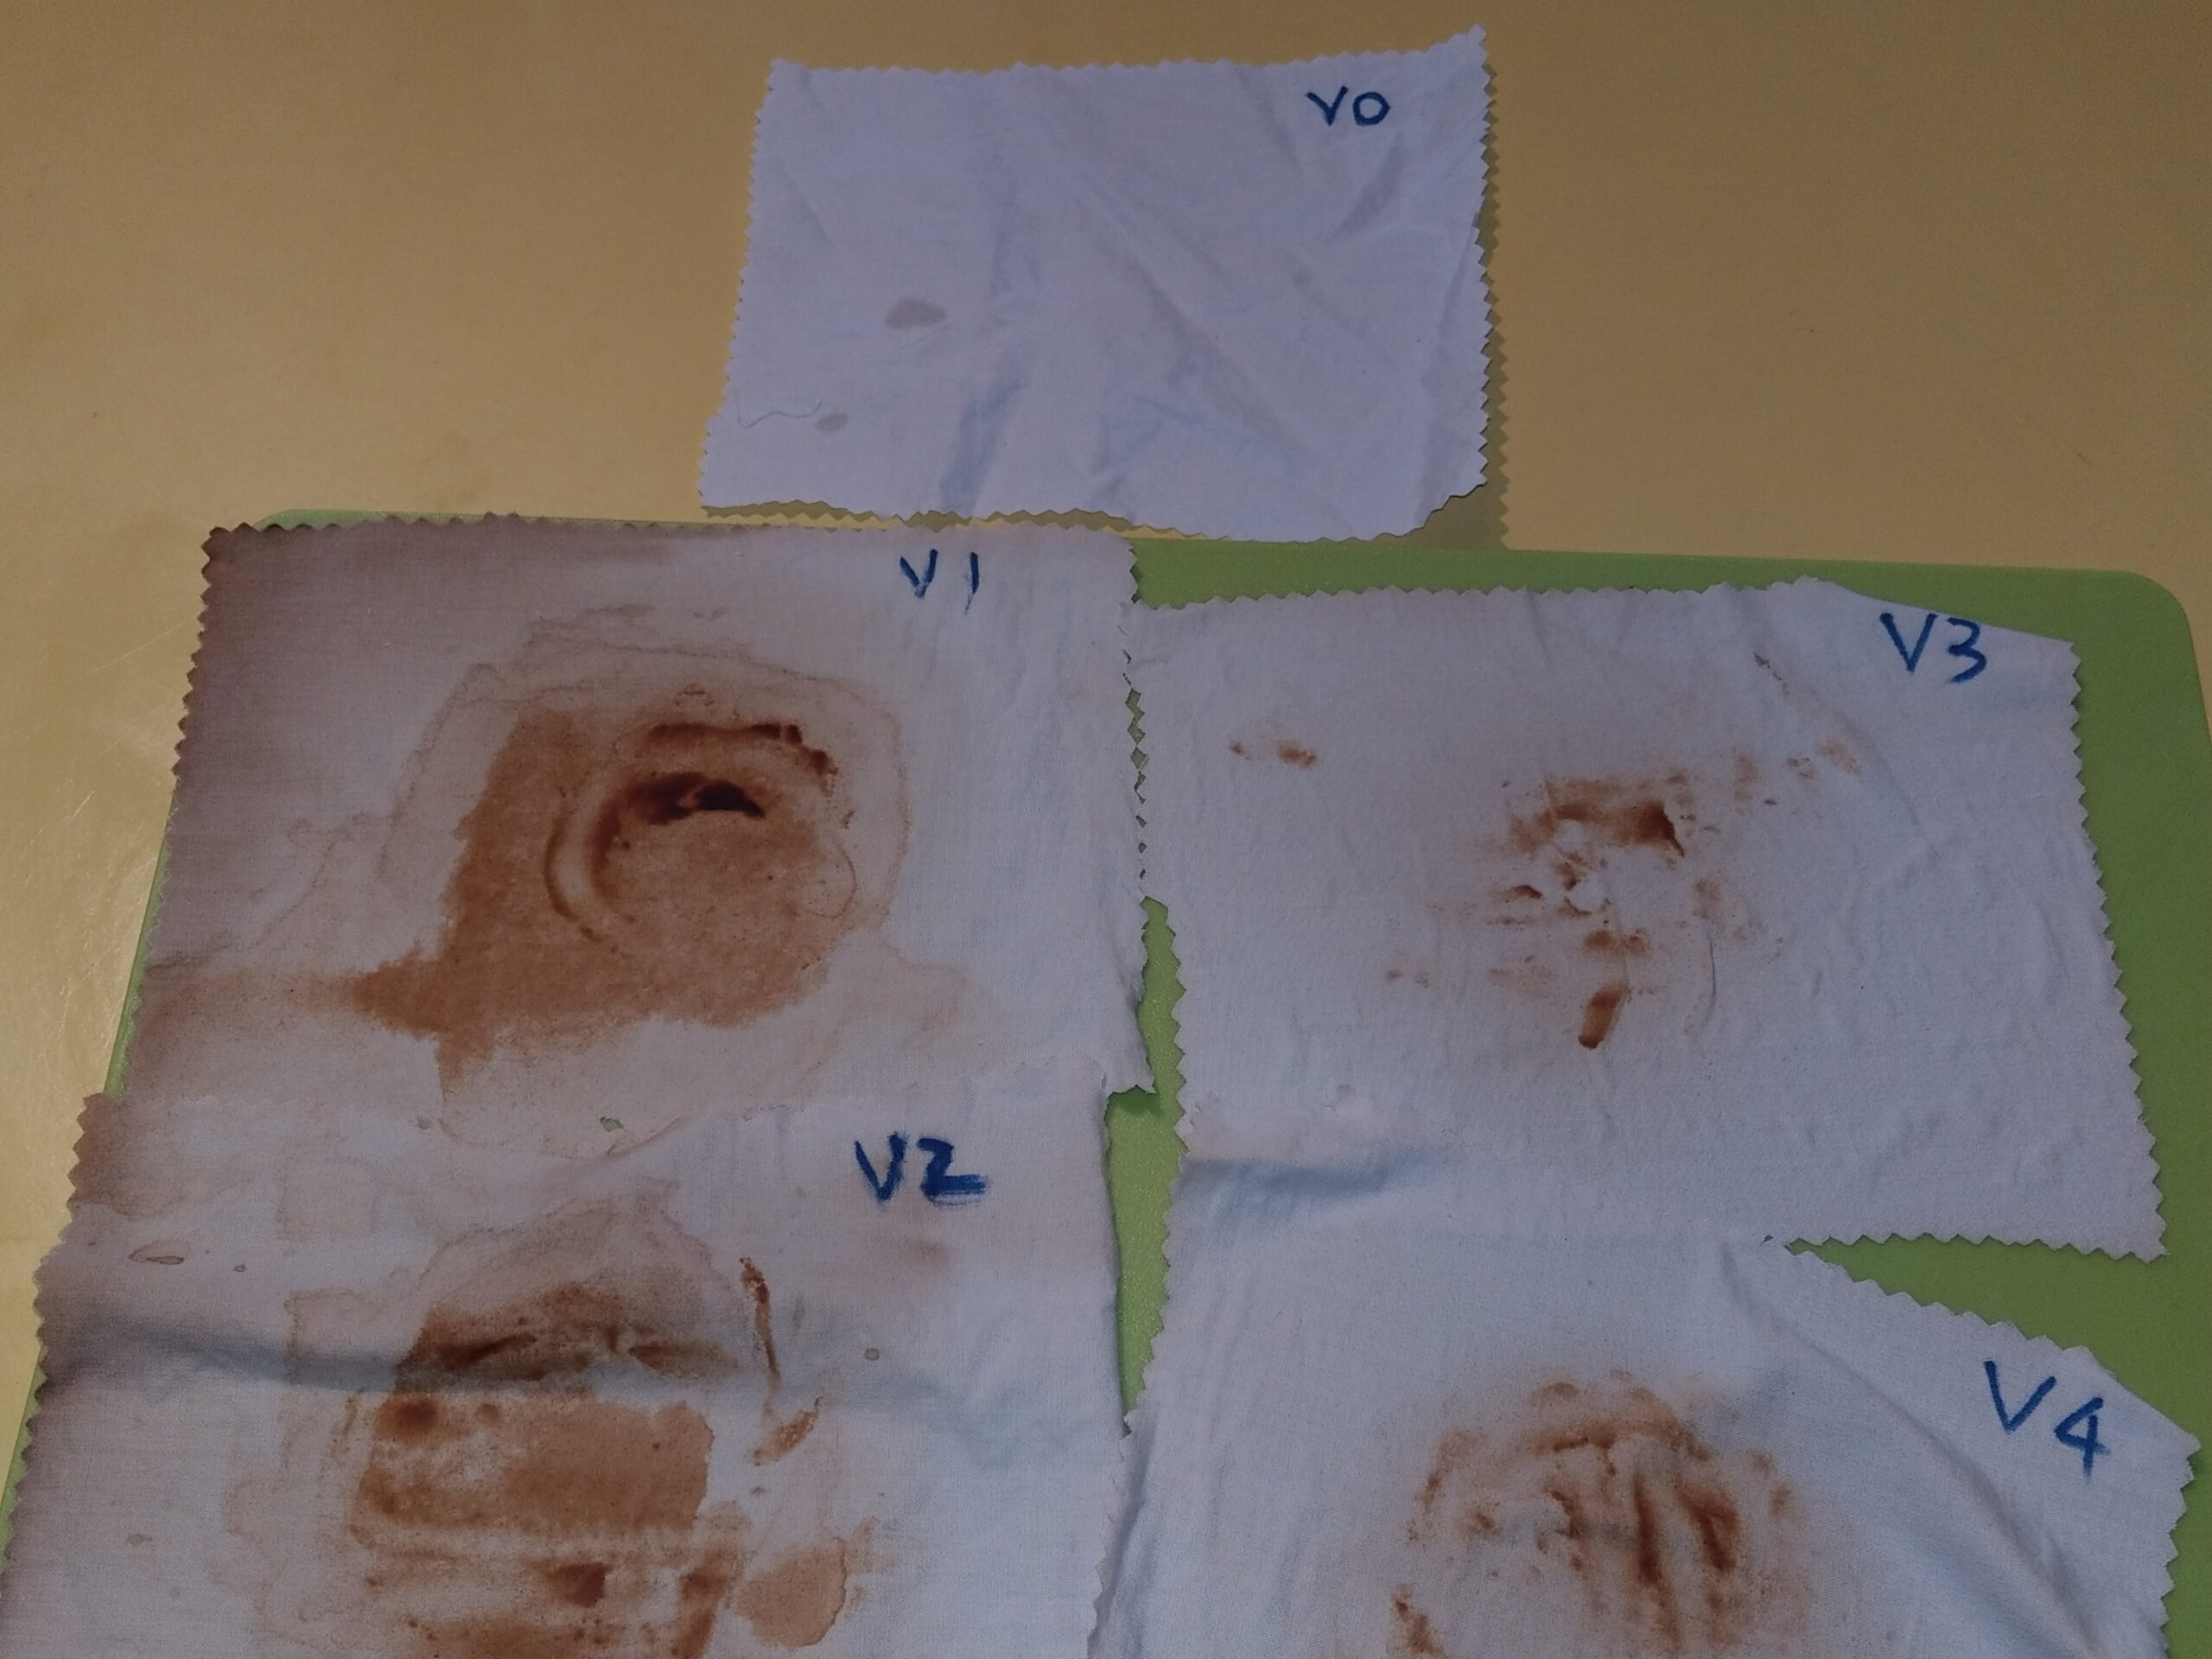
This last photo is of the fabric after treatment, washing and drying. Once again Treatment 3 was most effective- although it is hard to see from these photos. Once again the untreated sample, V4 still had some dark staining as did V1 and V2.
A few words about Recipe 3 (Treatment 3)
I believe that the soaking treatment was the better option and would use this method again.
This treatment was different to the first two in that it required soaking the stain fabric over a period of time. I soaked for 4 hours. So if you choose to use Recipe 3 be prepared for a bit of a wait. The solution must be made up as you need it. It was easy to see the colour from the RW (red wine) coming out of the fabric during the soaking time. The solution was slightly pink-red at the end of the 4 hours as you can see below.
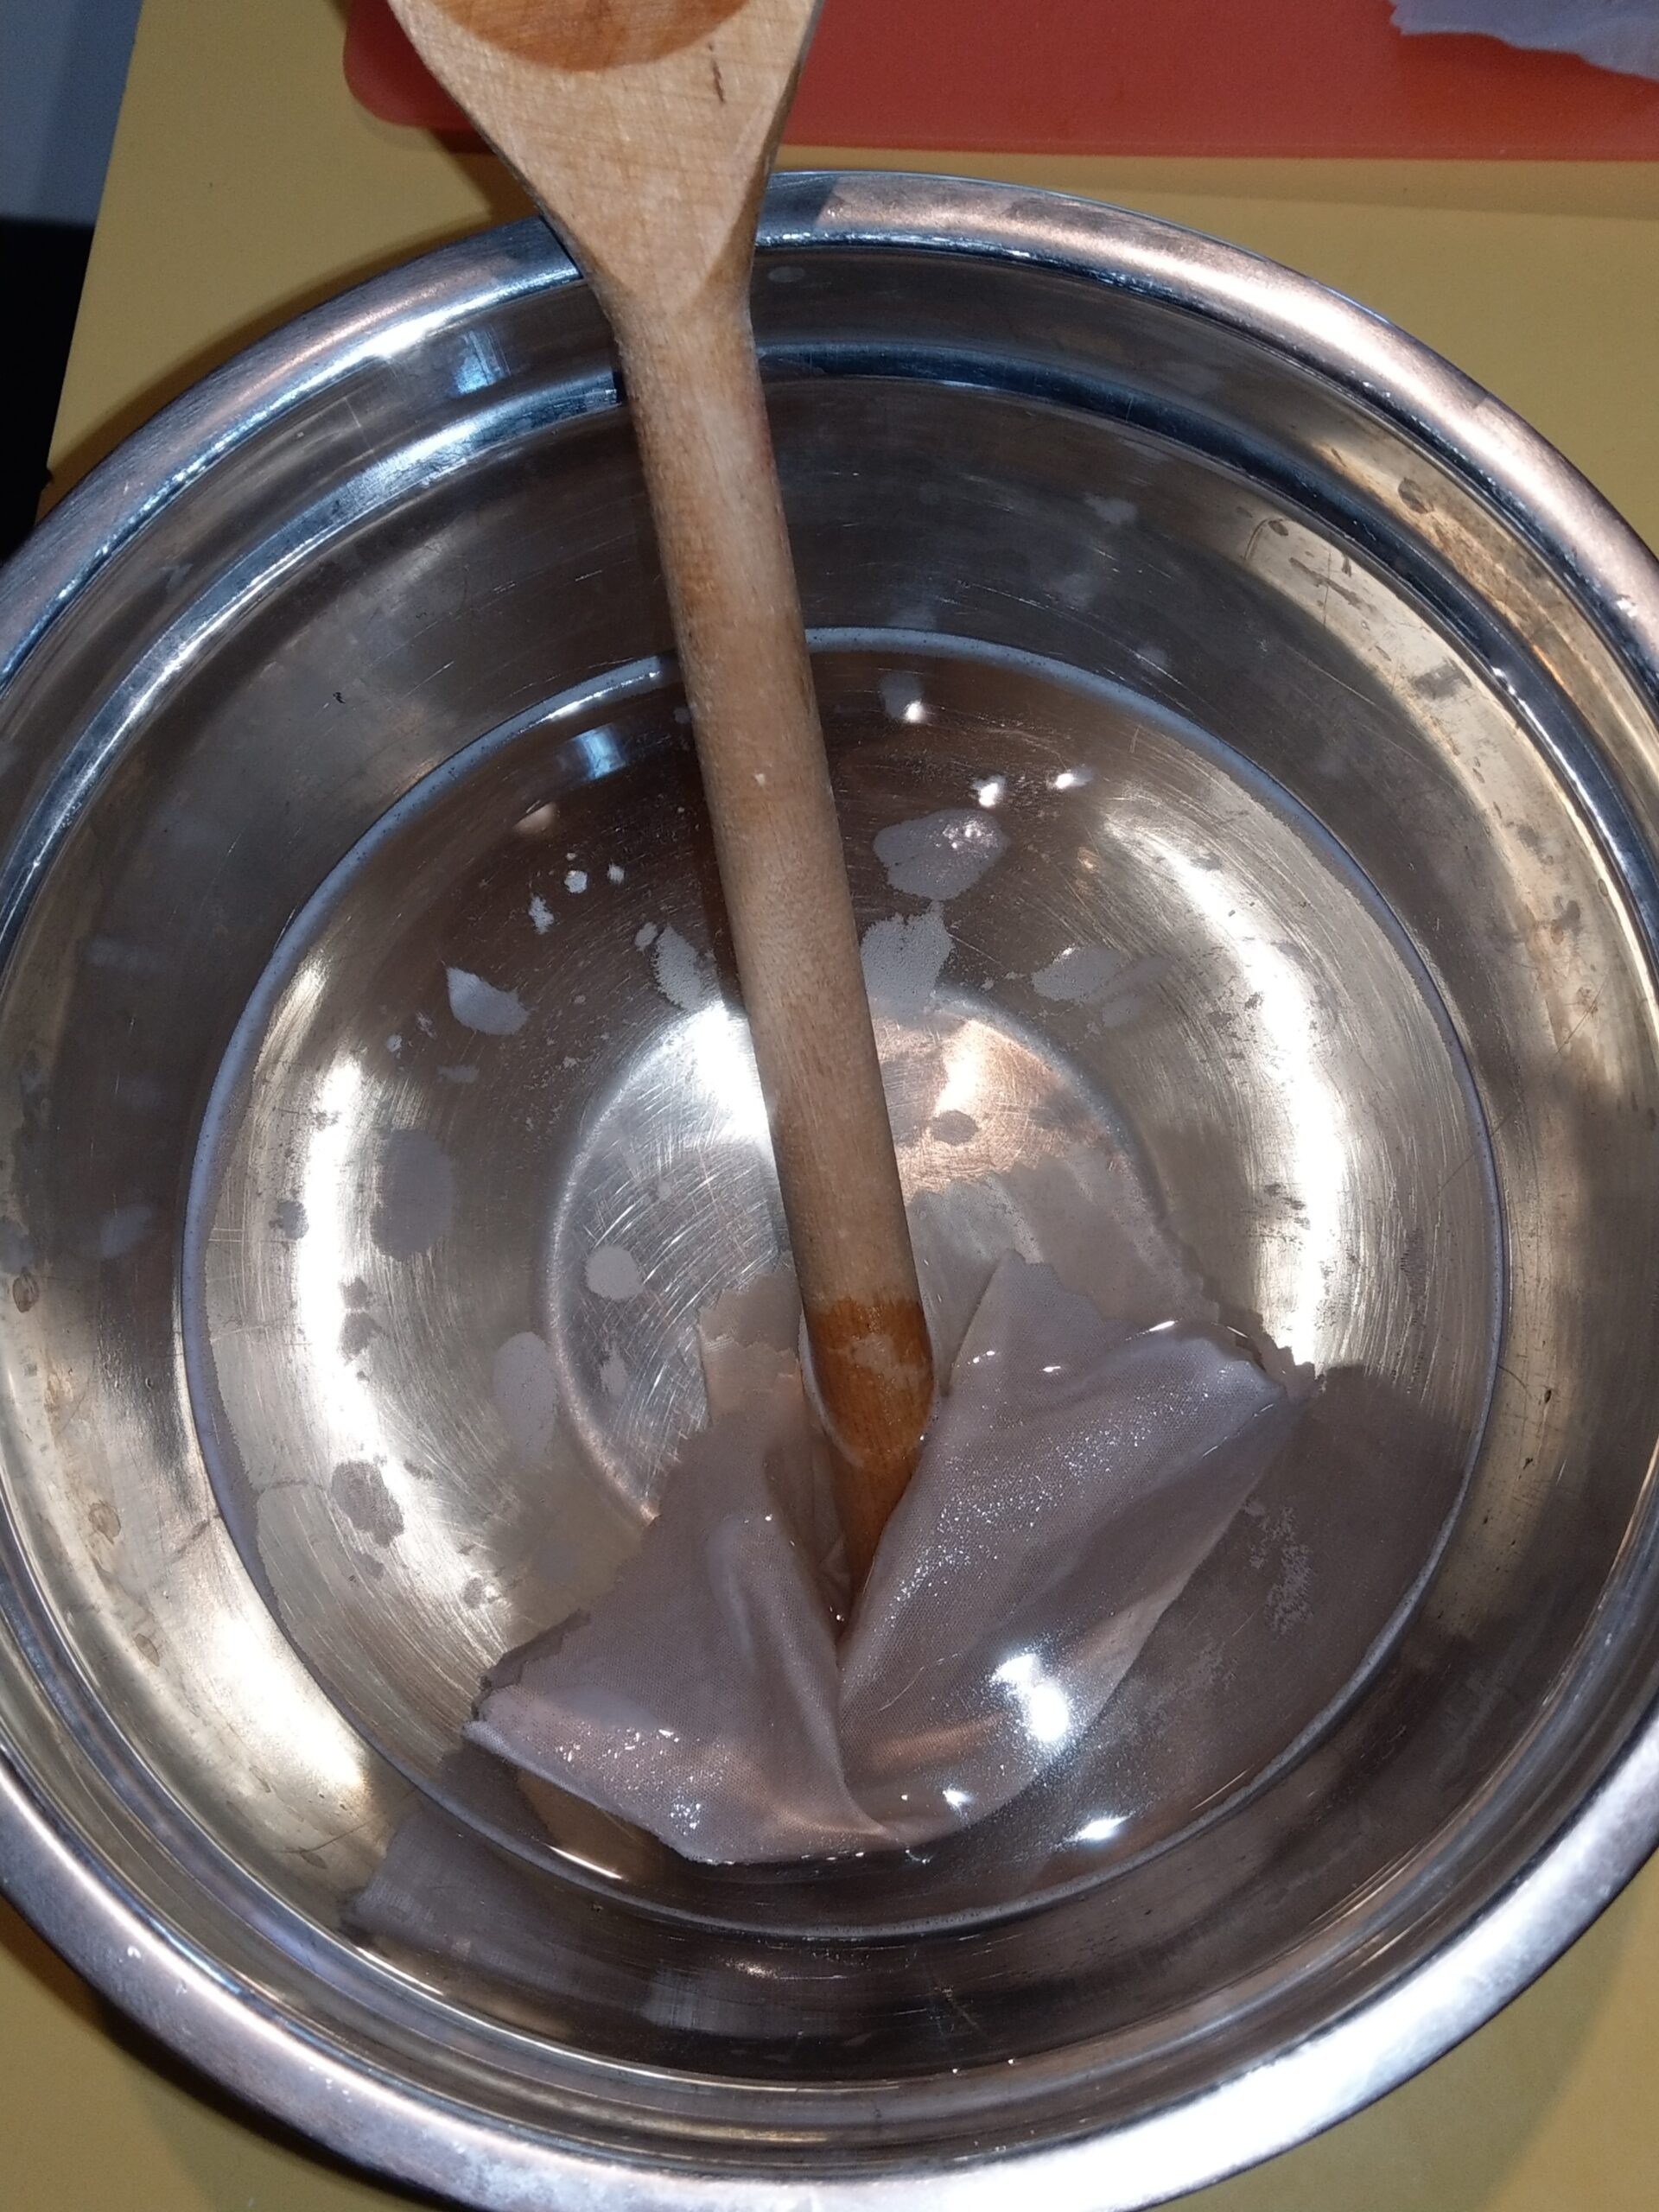
We did note that the fabric soaked in this solution lost some colour so be careful if you wish to use it with something that is brightly coloured.
A few words about Recipes 1 and 2
These two methods were just spray and wash treatments, although Recipe 1 did also call for some brushing of the stain. The stain removal power of these two recipes appeared to be limited, with Recipe 1 being marginally more effective than Recipe 2.
A few after thoughts
Don’t forget that my washing system was very simple i.e. agitation by hand for 2 minutes. If I had washed the fabric in a machine and allowed for complete wash and rinse cycles to be followed the result may have been better.
I would also suggest that you don’t leave stains to dry onto your fabric. The recipes actually suggest that you treat and wash the stains as quickly as possible. I wanted to make the job difficult for the purpose of the experiment but in real life I would be working as quickly as possible to remove the stain.
Final Words of Recommendation
These stain remover recipes definitely do work and I would use them. I believe that the soaking method is the one I would use going forward.
However, if I did not have the ingredients at hand I would use the diluted SalSuds recipe because I always have SalSuds in the house for dish washing, floor washing and for scrubbing difficult spots in the bathroom etc. It is a gentle but effective cleaner that can be used for multiple purposes.
But don’t take my word for it. If you want your house to be low tox and you are keen to remove as many commercial cleaning products as possible from your cleaning and washing routines, it is worth spending some time to work out the right recipes for you and your household.
So let us know what you think, what you have experimented with and what you would recommend. We are all ears!
What Next?
We hope you will join us at Helpful by Nature by subscribing to our email list. We would love to hear from you, take your questions and provide answers if we are able.

Until next time,
Gillian (and Andrew)